Skocz do zawartości

[C] Arduino + OpenCV + LED + VS++


ectineraa

Pomocna odpowiedź

Witajcie,
mam nadzieję, że temat wrzucam w dobrym dziale.

Siedzę od kilku dni nad tematem połączenia funkcji OpenCV z Arduino. Znalazłem w internecie masę gotowych kodów ale niestety nie są one tym czego szukam (np. kody gdzie kamera podąża za punktem/obiektem).

Niestety jestem początkujący w programowaniu w C++, a chcę zgłębić temat OpenCV ponieważ jest mi on potrzebny do projektu w pracy.

Potrzebowałbym pomocy w napisaniu prostego kodu na podstawie którego będę mógł się uczyć dalej i rozwijać temat .

Działanie miałoby być proste : Jeśli w zasięgu widzenia kamery znajdzie się obiekt o określonym kolorze, arduino odpala podpięty do niego led.

Podobne działanie jak na filmie

Mam kody ale dla sterowania serwem

VS++

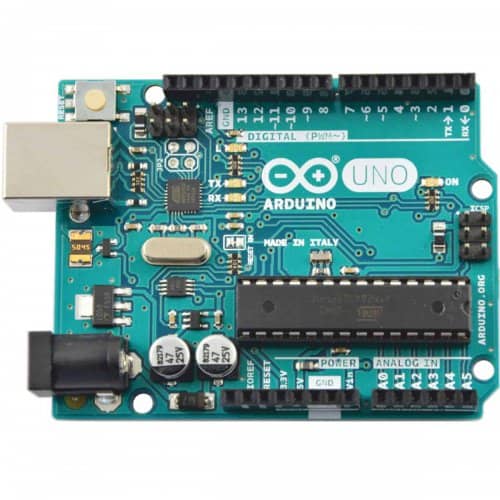
Arduino

Kod podstawowy dla arduino

int ledPin = 12;

void setup() 
{
 Serial.begin(9600);
 pinMode(ledPin,OUTPUT);

}

void loop()
{
char data = Serial.read();

switch (data){
 case '1': digitalWrite(ledPin,HIGH);break;
 case '2': digitalWrite(ledPin,LOW);break; 
}

}

Inny kod VS++/OpenCV

#include <iostream>

#include<opencv/cvaux.h>
#include<opencv/highgui.h>
#include<opencv/cxcore.h>

#include <sstream>
#include <string>
#include <opencv\cv.h>

#include<stdio.h>
#include<stdlib.h>

// Need to include this for serial port communication
#include <Windows.h>

///////////////////////////////////////////////////////////////////////////////////////////////////

int H_MIN = 0;
int H_MAX = 256;
int S_MIN = 0;
int S_MAX = 256;
int V_MIN = 0;
int V_MAX = 256; 
using namespace cv;

const string trackbarWindowName = "Trackbars";
void on_trackbar( int, void* )
{//This function gets called whenever a
// trackbar position is changed


}

void createTrackbars(){
//create window for trackbars


   namedWindow(trackbarWindowName,0);
//create memory to store trackbar name on window
char TrackbarName[50];
sprintf( TrackbarName, "H_MIN", H_MIN);
sprintf( TrackbarName, "H_MAX", H_MAX);
sprintf( TrackbarName, "S_MIN", S_MIN);
sprintf( TrackbarName, "S_MAX", S_MAX);
sprintf( TrackbarName, "V_MIN", V_MIN);
sprintf( TrackbarName, "V_MAX", V_MAX);
//create trackbars and insert them into window
//3 parameters are: the address of the variable that is changing when the trackbar is moved(eg.H_LOW),
//the max value the trackbar can move (eg. H_HIGH), 
//and the function that is called whenever the trackbar is moved(eg. on_trackbar)
//                                  ---->    ---->     ---->      
   createTrackbar( "H_MIN", trackbarWindowName, &H_MIN, H_MAX, on_trackbar );
   createTrackbar( "H_MAX", trackbarWindowName, &H_MAX, H_MAX, on_trackbar );
   createTrackbar( "S_MIN", trackbarWindowName, &S_MIN, S_MAX, on_trackbar );
   createTrackbar( "S_MAX", trackbarWindowName, &S_MAX, S_MAX, on_trackbar );
   createTrackbar( "V_MIN", trackbarWindowName, &V_MIN, V_MAX, on_trackbar );
   createTrackbar( "V_MAX", trackbarWindowName, &V_MAX, V_MAX, on_trackbar );


}

///////////////////////////////////////////////////////////////////////////////////////////////////
int main(int argc, char* argv[])
{
// Setup serial port connection and needed variables.
HANDLE hSerial = CreateFile(L"COM2", GENERIC_READ | GENERIC_WRITE, 0, 0, OPEN_EXISTING, FILE_ATTRIBUTE_NORMAL, 0);

if (hSerial !=INVALID_HANDLE_VALUE)
   {
       printf("Port opened! \n");

       DCB dcbSerialParams;
       GetCommState(hSerial,&dcbSerialParams);

       dcbSerialParams.BaudRate = CBR_9600;
       dcbSerialParams.ByteSize = 8;
       dcbSerialParams.Parity = NOPARITY;
       dcbSerialParams.StopBits = ONESTOPBIT;

       SetCommState(hSerial, &dcbSerialParams);
}
else
{
	if (GetLastError() == ERROR_FILE_NOT_FOUND)
	{
		printf("Serial port doesn't exist! \n");
	}

	printf("Error while setting up serial port! \n");
}

char outputChars[] = "c";
DWORD btsIO;

// Setup OpenCV variables and structures
CvSize size640x480 = cvSize(640, 480);			// use a 640 x 480 size for all windows, also make sure your webcam is set to 640x480 !!

CvCapture* p_capWebcam;						// we will assign our web cam video stream to this later . . .

IplImage* p_imgOriginal;			// pointer to an image structure, this will be the input image from webcam
IplImage* p_imgProcessed;			// pointer to an image structure, this will be the processed image
IplImage* p_imgHSV;                 // pointer to an image structure, this will hold the image after the color has been changed from RGB to HSV
									// IPL is short for Intel Image Processing Library, this is the structure used in OpenCV 1.x to work with images

CvMemStorage* p_strStorage;			// necessary storage variable to pass into cvHoughCircles()

CvSeq* p_seqCircles;				// pointer to an OpenCV sequence, will be returned by cvHough Circles() and will contain all circles
									// call cvGetSeqElem(p_seqCircles, i) will return a 3 element array of the ith circle (see next variable)

float* p_fltXYRadius;				// pointer to a 3 element array of floats
									// [0] => x position of detected object
									// [1] => y position of detected object
									// [2] => radius of detected object

int i;								// loop counter
char charCheckForEscKey;			// char for checking key press (Esc exits program)

p_capWebcam = cvCaptureFromCAM(0);	// 0 => use 1st webcam, may have to change to a different number if you have multiple cameras

if(p_capWebcam == NULL) {			// if capture was not successful . . .
	printf("error: capture is NULL \n");	// error message to standard out . . .
	getchar();								// getchar() to pause for user see message . . .
	return(-1);								// exit program
}


										            // declare 2 windows
cvNamedWindow("Original", CV_WINDOW_AUTOSIZE);		// original image from webcam
cvNamedWindow("Processed", CV_WINDOW_AUTOSIZE);		// the processed image we will use for detecting circles

createTrackbars();
p_imgProcessed = cvCreateImage(size640x480,			// 640 x 480 pixels (CvSize struct from earlier)
						      IPL_DEPTH_8U,		// 8-bit color depth
							   1);					// 1 channel (grayscale), if this was a color image, use 3

p_imgHSV = cvCreateImage(size640x480, IPL_DEPTH_8U, 3); 

// Variables for Arduino Control
int servoPosition = 90;
int servoOrientation = 0;
int servoPosition1=90;
int servoOrientation1=0;

// Main program loop
while(1) {								// for each frame . . .
	p_imgOriginal = cvQueryFrame(p_capWebcam);		// get frame from webcam

	if(p_imgOriginal == NULL) {					// if frame was not captured successfully . . .
		printf("error: frame is NULL \n");		// error message to std out
		getchar();
		break;
	}

	// Change the color model from RGB (BGR) to HSV. This makes it easier to choose a color based on Hue
	cvCvtColor(p_imgOriginal, p_imgHSV, CV_BGR2HSV);

	cvInRangeS(p_imgHSV,				// function input
			   cvScalar(H_MIN,  S_MIN,  V_MIN),			// min filtering value (if color is greater than or equal to this)
			   cvScalar(H_MAX, S_MAX, V_MAX),			// max filtering value (if color is less than this)
			   p_imgProcessed);				// function output

	p_strStorage = cvCreateMemStorage(0);	// allocate necessary memory storage variable to pass into cvHoughCircles()

									// smooth the processed image, this will make it easier for the next function to pick out the circles
	cvSmooth(p_imgProcessed,		// function input
			 p_imgProcessed,		// function output
			 CV_GAUSSIAN,			// use Gaussian filter (average nearby pixels, with closest pixels weighted more)
			 9,						// smoothing filter window width
			 9);					// smoothing filter window height

												// fill sequential structure with all circles in processed image
	p_seqCircles = cvHoughCircles(p_imgProcessed,		// input image, nothe that this has to be grayscale (no color)
								  p_strStorage,			// provide function with memory storage, makes function return a pointer to a CvSeq
								  CV_HOUGH_GRADIENT,	// two-pass algorithm for detecting circles, this is the only choice available
								  2,					// size of image / 2 = "accumulator resolution", i.e. accum = res = size of image / 2
								  p_imgProcessed->height / 4,	// min distance in pixels between the centers of the detected circles
								  100,						// high threshold of Canny edge detector, called by cvHoughCircles
								  50,						// low threshold of Canny edge detector, called by cvHoughCircles
								  10,	 //10					// min circle radius, in pixels
								  400);						// max circle radius, in pixels

	// Run this if the camera doesn't detect any circles
	if (p_seqCircles->total == 0)
	{
		// Initialize orientation
		// This just makes it so the camera first goes to the side that it's leaning towards
		// So if the camera is already mostly facing the left side it goes to the left end
		// before going to the right. And the other way around.
		if (servoOrientation == 0)
		{
			if (servoPosition >= 90)
				servoOrientation = 1;
			else
				servoOrientation = -1;
		}

		if (servoOrientation == 1)
		{
			outputChars[0] = 'l';
			WriteFile(hSerial, outputChars, strlen(outputChars), &btsIO, NULL);

			// This code is identical to the one on the Arduino side
			servoPosition+=1;

			if (servoPosition > 180)
			{
				servoPosition = 180;
				servoOrientation = -1;
			}
		}
		else
		{
			outputChars[0] = 'r';
			WriteFile(hSerial, outputChars, strlen(outputChars), &btsIO, NULL);

			// This code is identical to the one on the Arduino side
			servoPosition-=1;

			if (servoPosition < 0)
			{
				servoPosition = 0;
				servoOrientation = 1;
			}

		}

///////////////////////////////////////////////////////////////////////////////////
		if (servoOrientation1 == 0)
		{
			if (servoPosition1 >= 150)
				servoOrientation1 = 1;
			else
				servoOrientation1 = -1;
		}

		if (servoOrientation1 == 1)
		{
			outputChars[0] = 'u';
			WriteFile(hSerial, outputChars, strlen(outputChars), &btsIO, NULL);

			// This code is identical to the one on the Arduino side
			servoPosition1+=3;

			if (servoPosition1 > 160)
			{
				servoPosition1 = 160;
				servoOrientation1 = -1;
			}
		}
		else
		{
			outputChars[0] = 'd';
			WriteFile(hSerial, outputChars, strlen(outputChars), &btsIO, NULL);

			// This code is identical to the one on the Arduino side
			servoPosition1-=3;

			if (servoPosition1 < 140)
			{
				servoPosition1 = 140;
				servoOrientation1 = 1;
			}

		}


///////////////////////////////////////////////////////////////////////////////////
	}


	// Run this if the camera can see at least one circle
	//for(i=0; i < p_seqCircles->total; i++) {		// for each element in sequential circles structure (i.e. for each object detected)
	    if (p_seqCircles->total == 1)
		{
		p_fltXYRadius = (float*)cvGetSeqElem(p_seqCircles, 1);	// from the sequential structure, read the ith value into a pointer to a float

		printf("ball position x = %f, y = %f, r = %f \n", p_fltXYRadius[0],		// x position of center point of circle
														  p_fltXYRadius[1],		// y position of center point of circle
														  p_fltXYRadius[2]);	// radius of circle

		// Reset servo orientation as the camer a now has focus of a circle
		// Servo orientation is important only when the camera doesn't see a circle
		servoOrientation = 0;

		//char outputChars[] = "p_fltXYRadius[0]";
	    //WriteFile(hSerial, outputChars, strlen(outputChars), &btsIO, NULL);

		//char outputChars1[] = "p_fltXYRadius[1]";
		//WriteFile(hSerial, outputChars1, strlen(outputChars1), &btsIO, NULL);


		// Check whether camera should turn to its left if the circle gets near the right end of the screen
		if (p_fltXYRadius[0] > 400)
		{
			outputChars[0] = 'l';
			WriteFile(hSerial, outputChars, strlen(outputChars), &btsIO, NULL);

			servoPosition+=1;

			if (servoPosition > 180)
				servoPosition = 180;
		}

		// Check whether camera should turn to its right if the circle gets near the left end of the screen
		if (p_fltXYRadius[0] < 240)
		{
			outputChars[0] = 'r';
			WriteFile(hSerial, outputChars, strlen(outputChars), &btsIO, NULL);

			servoPosition-=1;

			if (servoPosition < 0)
				servoPosition = 0;
		}


///////////////////////////////////////////////////////////////////
		servoOrientation1 = 0;

		if (p_fltXYRadius[1] > 320)
		{
			outputChars[0] = 'e';
			WriteFile(hSerial, outputChars, strlen(outputChars), &btsIO, NULL);

			servoPosition1+=1;

			if (servoPosition1 > 180)
				servoPosition1 = 180;
		}

		// Check whether camera should turn to its right if the circle gets near the left end of the screen
		if (p_fltXYRadius[1] < 160)
		{
			outputChars[0] = 'f';
			WriteFile(hSerial, outputChars, strlen(outputChars), &btsIO, NULL);

			servoPosition1-=1;

			if (servoPosition1 < 0)
				servoPosition1 = 0;
		}


///////////////////////////////////////////////////////////////////
									// draw a small green circle at center of detected object
		cvCircle(p_imgOriginal,										// draw on the original image
				 cvPoint(cvRound(p_fltXYRadius[0]), cvRound(p_fltXYRadius[1])),		// center point of circle
				 3,													// 3 pixel radius of circle
				 CV_RGB(0,255,0),									// draw pure green
				 CV_FILLED);										// thickness, fill in the circle

									// draw a red circle around the detected object
		cvCircle(p_imgOriginal,										// draw on the original image
				 cvPoint(cvRound(p_fltXYRadius[0]), cvRound(p_fltXYRadius[1])),		// center point of circle
				 cvRound(p_fltXYRadius[2]),							// radius of circle in pixels
				 CV_RGB(255,0,0),									// draw pure red
				 3);												// thickness of circle in pixels
	}	// end for

	cvShowImage("Original", p_imgOriginal);			// original image with detectec ball overlay
	cvShowImage("Processed", p_imgProcessed);		// image after processing

	cvReleaseMemStorage(&p_strStorage);				// deallocate necessary storage variable to pass into cvHoughCircles

	charCheckForEscKey = cvWaitKey(10);				// delay (in ms), and get key press, if any
	if(charCheckForEscKey == 27) break;				// if Esc key (ASCII 27) was pressed, jump out of while loop
}	// end while

cvReleaseCapture(&p_capWebcam);					// release memory as applicable

cvDestroyWindow("Original");
cvDestroyWindow("Processed");

// This closes the Serial Port
   CloseHandle(hSerial);

return(0);
}

Mógłby mi ktoś pomóc i przerobić kod VS++ pod led tak jak to opisałem wyżej ?

Link do komentarza
Share on other sites

Dołącz do dyskusji, napisz odpowiedź!

Jeśli masz już konto to zaloguj się teraz, aby opublikować wiadomość jako Ty. Możesz też napisać teraz i zarejestrować się później.
Uwaga: wgrywanie zdjęć i załączników dostępne jest po zalogowaniu!

Anonim
Dołącz do dyskusji! Kliknij i zacznij pisać...

×   Wklejony jako tekst z formatowaniem.   Przywróć formatowanie

  Dozwolonych jest tylko 75 emoji.

×   Twój link będzie automatycznie osadzony.   Wyświetlać jako link

×   Twoja poprzednia zawartość została przywrócona.   Wyczyść edytor

×   Nie możesz wkleić zdjęć bezpośrednio. Prześlij lub wstaw obrazy z adresu URL.

×
×
  • Utwórz nowe...

Ważne informacje

Ta strona używa ciasteczek (cookies), dzięki którym może działać lepiej. Więcej na ten temat znajdziesz w Polityce Prywatności.